
I have been toying with the idea of making a tutorial for a
couple of months, bear with me…this is my first one! Any suggestions for improvement are welcome!
Here's the completed canvas

Materials Used
Artist’s
Loft 6x8 Canvas Board
Gesso
Claudine
Helmuth Matte Medium
Glossy
Accents
Hot Glue
Ranger
Crackle Paint – Clear Rock Candy
Ranger
Distress Inks – Wild Honey, Pumice Stone, Vintage Photo,
Walnut Stain, Fired Brick
Adirondack
Paint Dabbers – Sand, Espresso, Cranberry, Gold
Adirondack
Alcohol Inks – Red Pepper
Mary Queen
of Heaven Image
Reduced
image of sheet music for Schubert’s Ave Maria
Our Daily
Bread Designs Stamps – Blessed Virgin Mary, Hail Mary
Prima
Romantique Collection 8x8 paper stack
Chipboard
flourish
Prima Roses
Garden Gate
Rose Petals
Maya Road
Heart & Corsage Pins
Tim Holtz
Idea-ology Heart Charm
Prima Crown
Charm
Step 1 –
Prepare the canvas
Apply a
medium coat of Gesso over the entire canvas.
Don’t worry about getting it smooth – we are going for texture!


Step 2 –
Apply base color to canvas
Before the
Gesso is dry, apply acrylic paint to the canvas. Since we are going for texture, I used a
scruffy brush to “pounce” the paint on.
You probably wouldn’t need to cover the entire canvas with paint since
most of it will be covered by other things, but I do it this way to get a feel
for where the colors should go.


Set the
canvas aside for a bit.
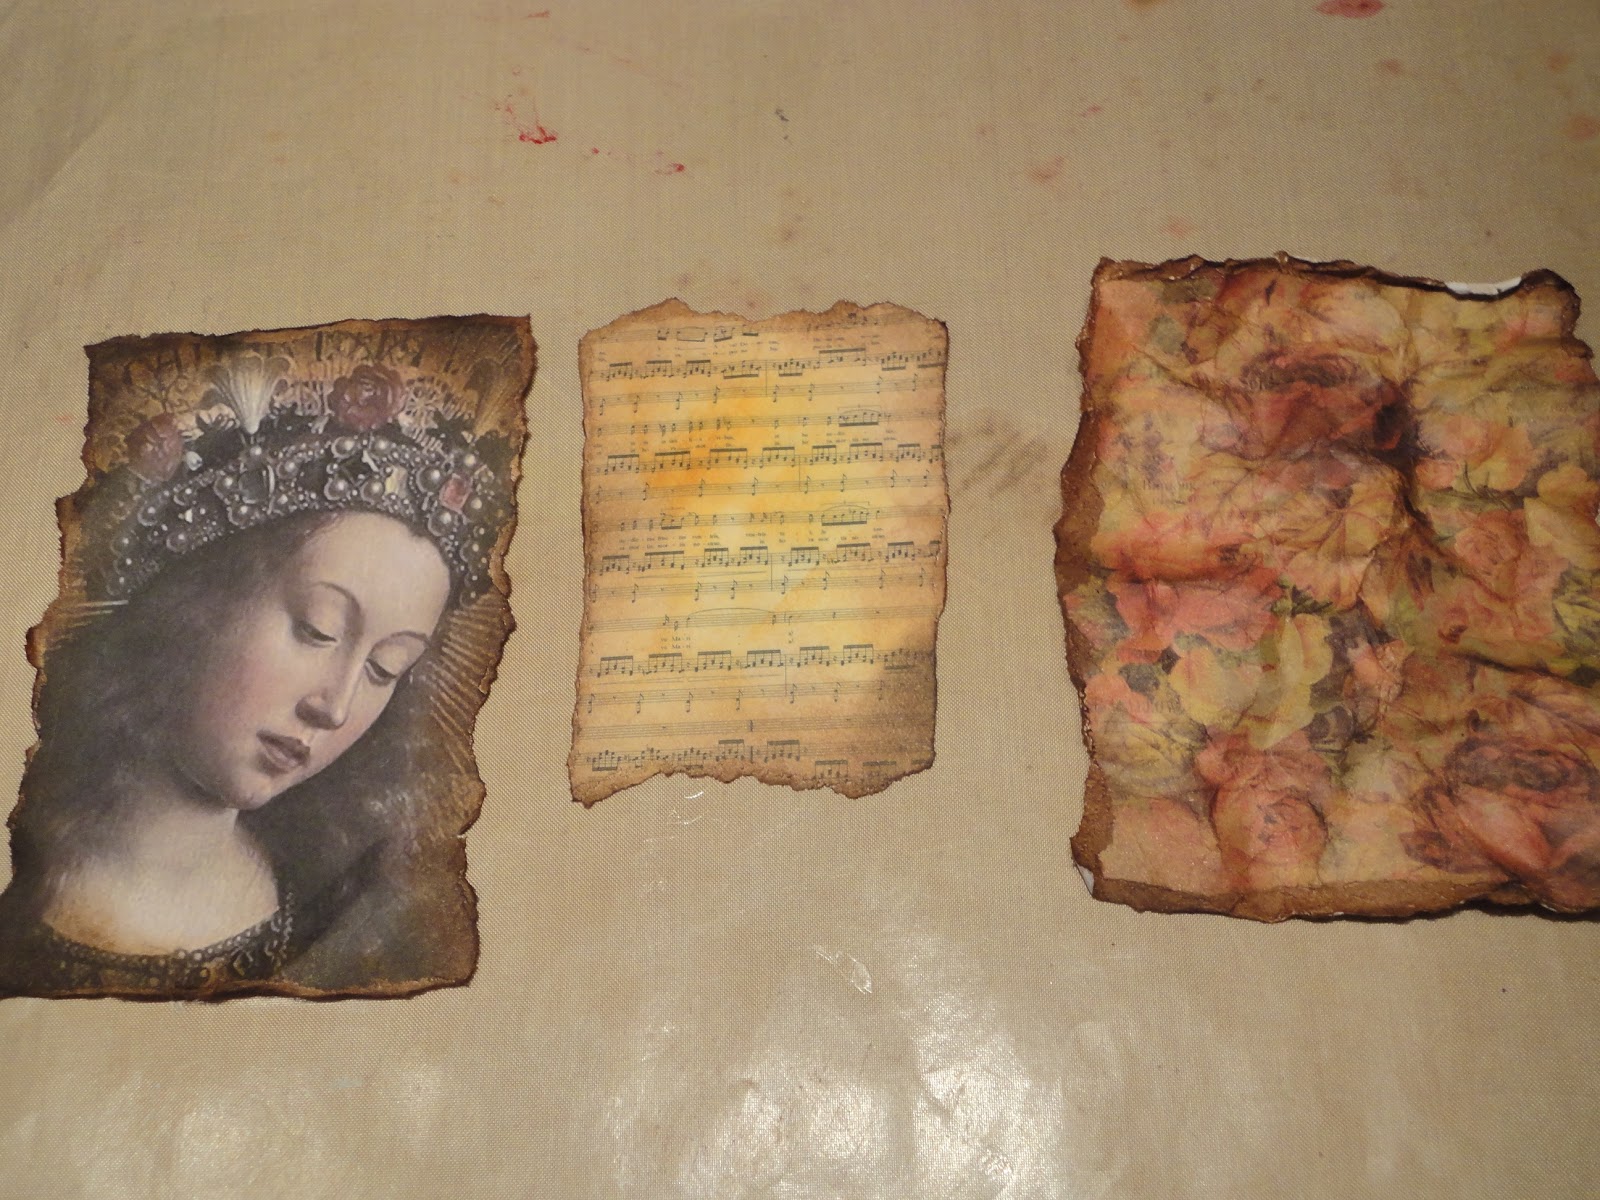
Step 3 –
Prepare the images & decorative paper elements
I printed
the images of Mary and the Schubert piece on regular paper using my HP
Photosmart printer because I wanted both pieces to be able to wrinkle and
cardstock just doesn’t do that on its own.
Mary is printed as a 4x6 and the Schubert is 3x5
Tear the
edges of the images – you can make them whatever size you like – Since the
image of Mary is the focal point of this piece, I just took off the edges.


Apply
Distress Ink in Wild Honey, Vintage Photo and Walnut Stain to the images &
decorative paper.


I decided
that my decorative paper was too bright, so I hit the center with a good coat
of Pumice Stone Distress Ink to tone it down.
I still wasn’t happy with it, so I crumpled the paper & hit the tops
of the creases with walnut stain.


Step 4 –
Apply images & decorative paper to canvas.
The Gesso
& Acrylic Paint should still be tacky at this point – I just applied the
decorative paper directly to the canvas knowing that the gesso & paint
would hold it in place. I used Claudine
Hellmuth’s Matte Medium to glue the images in place on top.


Set the
canvas aside to dry completely. You can
speed up the drying time by using a heat tool.
Step 5 –
Prepare the embellishments
Cover the
chipboard flourish with a page from an old dictionary using Claudine Hellmuth’s
Matte Medium – when dry; distress it with Vintage Photo and Walnut Stain
Distress Inks.


A few drops
of Red Pepper Alcohol Ink gives the brass heart charm a great deep red color.

I also hit
the crown with some Walnut Stain Distress Ink to take down the shine and give
it a more vintage look.

Apply a
little Distress Crackle Paint in Clear Rock Candy to all of the flowers and
leaves – let dry.

By this
time, your canvas should be dry, if not – use a heat tool to finish the drying
process.
Step 6 –
Crackle Paint
Once the
canvas is completely dry, apply a medium coat of Distress Crackle Paint in
Clear Rock Candy over the entire canvas.
Don’t worry about straight brush strokes, the paint will smooth itself
out.

Stick the
chipboard flourish down to the canvas – positioning it along one side – and
cover with crackle paint.


Don’t worry
if your papers bubble a little – we want
the texture! Set canvas aside to
dry. Once the canvas begins to dry and
you can see cracks start to form, you can use a heat tool to speed the process
up, just be careful not to overheat, as this will cause the crackle paint to bubble.
Step 7 –
Distress
Once the
canvas is completely dry, apply Distress Ink over the crackle to bring out the
cracks.


Just keep
adding Distress Ink until you’re happy with how it looks. I used Fired Brick, Vintage Photo, and Walnut
Stain. You can wipe off some of the ink
on top to make the cracks show better.

Step 8 –
Stamp!
Stamp Ave
Maria from Our Daily Bread Designs Blessed Virgin Mary set in the lower left
corner and the Hail Mary in the upper right corner. Because you are stamping on top of crackle
paint which has a glossy finish, you need to use StazOn or another solvent ink.


Step 10 –
Embellish!
Adhere roses to Mary’s crown and the heart charm using
Glossy Accents. Distress the flowers and
leaves with a little Vintage Photo or Walnut Stain.


Wow! Gorgeous! Thanks for the clear step by step!
ReplyDelete